
Why you need to have TOC in your blogger post?
TOC has been known to improved user experience, and it is a very important part of a blog which many of Blogger necessarily don't deem as important features of the blog. But what you have to consider is that, according to a study user experience is the fundamental to get higher ranking in SERP. Table of Content will going to help you, improve the user experience of your blog, as a research by NN Group stated more than 79% of total web readers are scanners who only read the important points of a web-page. Plus, it will help in organising your blog post neatly, that will essentially help your readers due to it's simplicity and guidance.
You just have to go through five simple steps, and you'll be able to have your TOC created automatically, and it's fairly easy to operate and much easier to corporate in your post.
1. Login to blogger account.
You need to sign in into your account. And go to Theme. And go to Edit HTML. Follow the following image guidance.

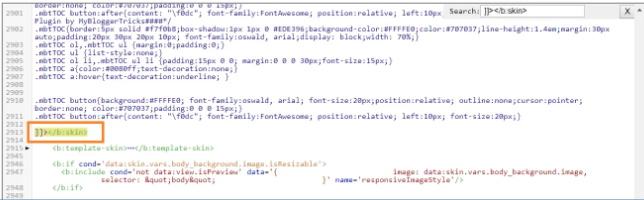
2. Adding scripts
You just have to press CTRL+F
It will show up a search box, and in that search box type the code </head> , and just above (before) </head> copy and paste the following code:<link href='http://fortawesome.github.io/Font-Awesome/assets/font-awesome/css/font-awesome.css' rel='stylesheet'/>
<link href='http://fonts.googleapis.com/css?family=Oswald' rel='stylesheet' type='text/css'/>
<script type='text/javascript'>
//<![CDATA[
//*************TOC plugin by MyBloggerTricks.com
function mbtTOC() {var mbtTOC=i=headlength=gethead=0;
headlength = document.getElementById("post-toc").getElementsByTagName("h2").length;for (i = 0; i < headlength; i++)
{gethead = document.getElementById("post-toc").getElementsByTagName("h2")[i].textContent;document.getElementById("post-toc").getElementsByTagName("h2")[i].setAttribute("id", "point"+i);mbtTOC = "<li><a href='#point"+i+"'>"+gethead+"</a></li>";document.getElementById("mbtTOC").innerHTML += mbtTOC;}}function mbtToggle() {var mbt = document.getElementById('mbtTOC');if (mbt .style.display === 'none') {mbt .style.display = 'block';} else {mbt .style.display = 'none';}}
//]]>
</script>
3. Adding CSS
.mbtTOC{
        border:5px solid #f7f0b8;
        box-shadow:1px 1px 0 #EDE396;
        background-color:#FFFFE0;
        color:#707037;
        line-height:1.4em;
        margin:30px auto;
        padding:20px 30px 20px 10px;
        font-family:oswald, arial;
        display: block;
         width: 70%;
        }

.mbtTOC ol,.mbtTOC ul {
        margin:0;
        padding:0;
                      }

.mbtTOC ul {
        list-style:none;
           }

.mbtTOC ol li,.mbtTOC ul li {
        padding:15px 0 0;
        margin:0 0 0 30px;
        font-size:15px;
                            }

.mbtTOC a{
        color:#0080ff;
        text-decoration:none;
          }

.mbtTOC a:hover{
        text-decoration:underline;
              }


.mbtTOC button{
        background:#FFFFE0;
        font-family:oswald, arial;
        font-size:20px;position:relative;
        outline:none;
        cursor:pointer;
        border:none;
        color:#707037;
        padding:0 0 0 15px;
               }

.mbtTOC button:after{
        content: "\f0dc";
        font-family:FontAwesome;
        position:relative;
        left:10px;
        font-size:20px;
                    }
4. Changing internal code
<div id="post-toc"><data:post.body/></div>
5. Activating your TOC table.


<div class="mbtTOC">
    <button onclick="mbtToggle()">Contents</button>
    <ol id="mbtTOC"></ol>
</div>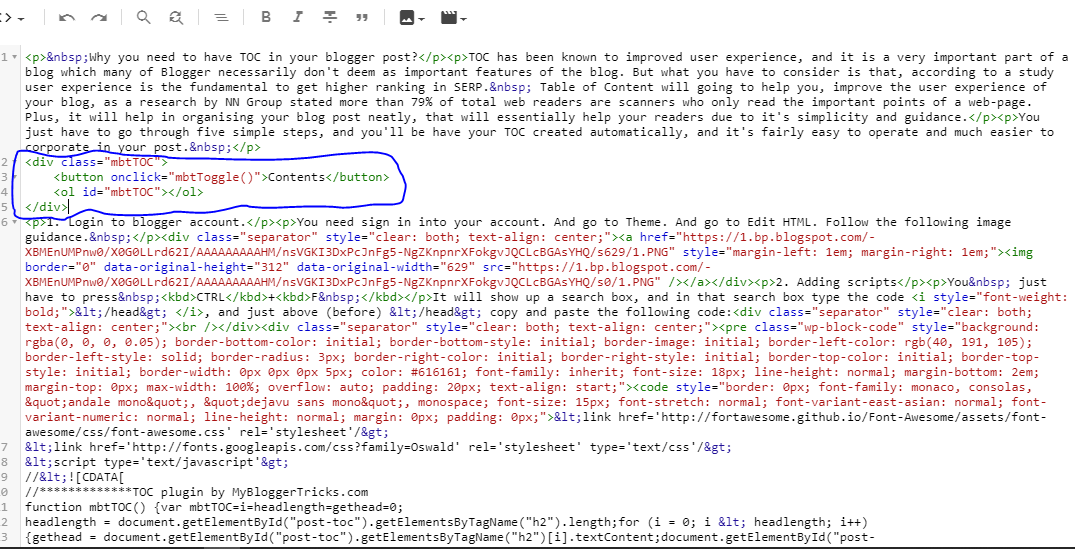
<script>mbtTOC();</script>
Credit goes to: mybloggingtricks.com


